The Minotaur statue puzzle appears near the end of the first Trial in Chapter 4. First record the symbols around the floor, then activate the two linked pairs shown in Sophia's journal. Each completed pair brings one hand up to the platform edge. Wait for it to settle beside the eye-marked floor plate, then reveal a new symbol on its ring, light the first hidden wall slot directly, and route the other side beam through the mirror in the middle. The completed path raises the statue and a column that opens the bridge forward.
Solution at a glance
- Record the floor clues. Walk the room's perimeter until Sophia's journal shows the 2 visible pairs.
- Light the bell/semicircle and fork/T pair. When a hand rises, reveal the mark on its ring and let the journal record it.
- Light the triangle and downward-fingers pair. Reveal the other raised hand's ring. The first 2 pairs can be completed in either order.
- Light the first hidden slot directly. Use the wall relationship below the triangle; this target does not need the central mirror.
- Route the final beam through the central mirror to the hidden slot beside the triangle, keeping the other hidden target lit.
- Use the newly revealed column, then clear the ambush. After the fight, interact with the column again to raise the bridge.
Success check: both hand clues are recorded, the statue has risen, and the bridge opens after the fight and the second column interaction.
Continuous player footage used to verify the clue scan, both raised-hand reveals, and the final mirror route. It is community evidence, not an official solution.
The six-symbol shorthand used by GameRant is T as 1, inverted Y as 2, triangle as 3, W as 4, semicircle as 5, and a lyre-like mark as 6. Its pair notation is 1 with 5, 3 with 6, then the hidden 2 with 4. The August 29 gameplay walkthrough describes the same shapes less formally as bell and fork, triangle and three downward fingers, then two newly recorded marks. Treat those names as visual aids rather than official terminology.
The order of the first two pairs does not matter, but finish one pair before starting the other. From the entrance, every light source has a reflector facing a section of the symbol wall. Written guides sometimes reverse “left” and “right” because their authors face different directions. The instructions below therefore use the entrance, the statue, the triangle and nearby wall slots as fixed references.
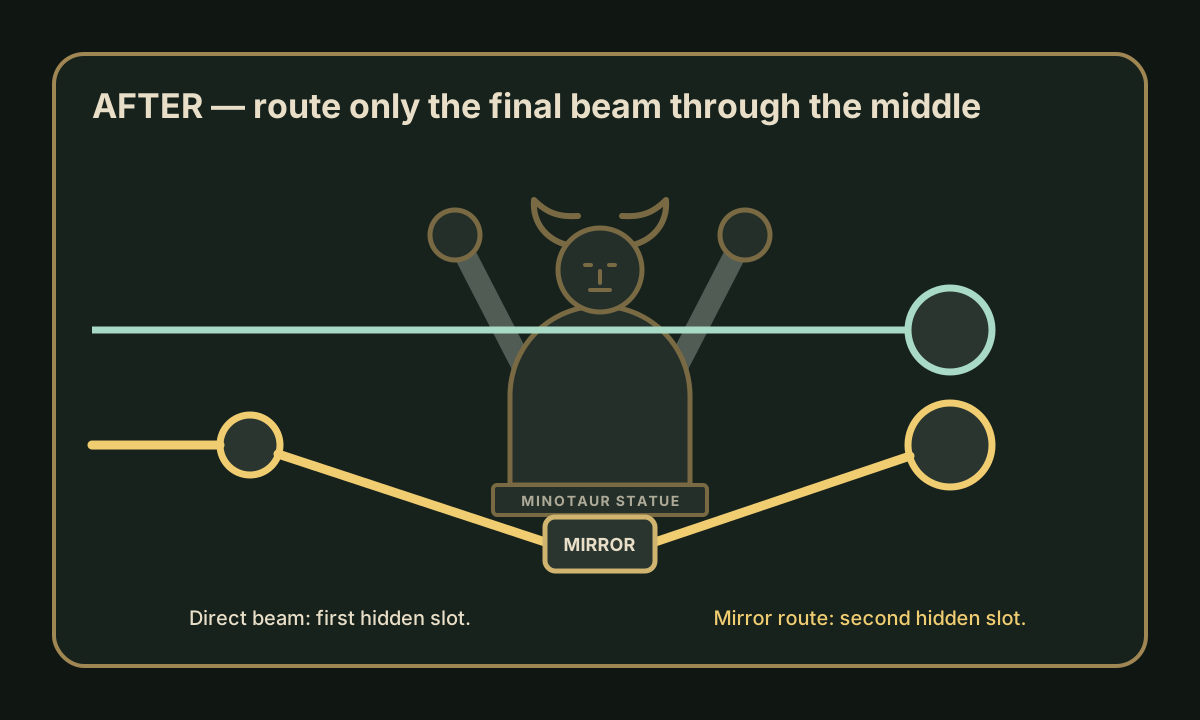
Only the final hidden slot needs the central mirror. Do not route both final beams through the middle.
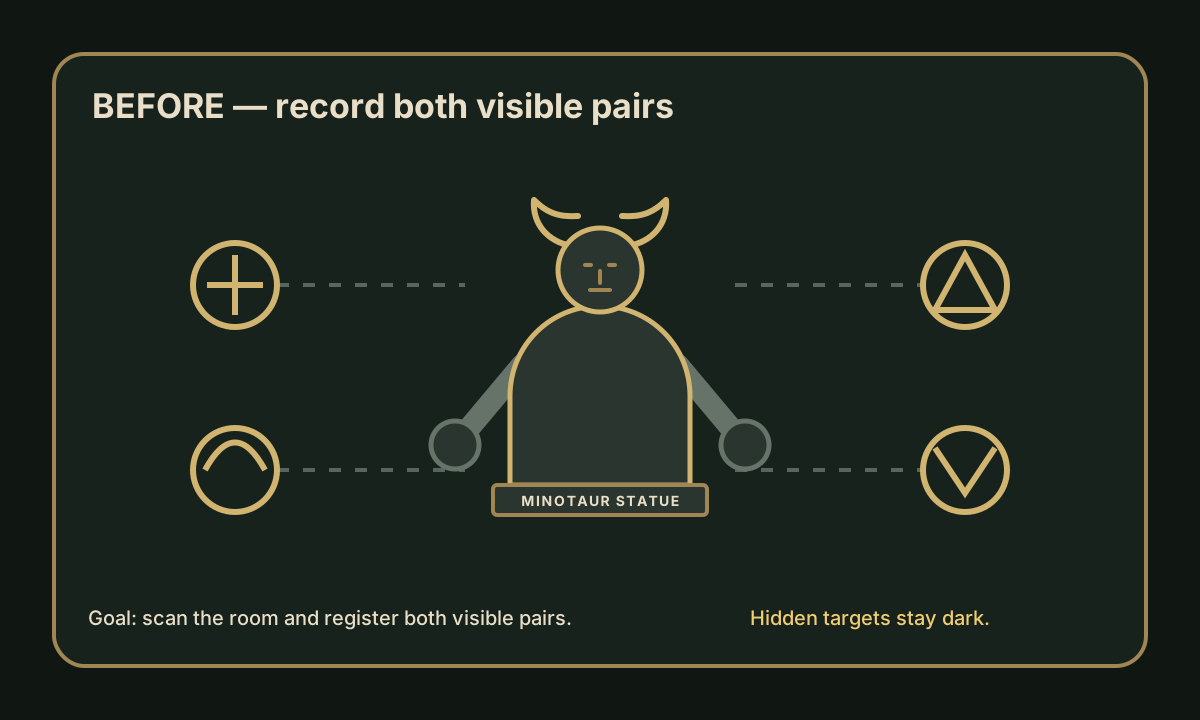
Circle the edge of the floor so the nearby markings register. The journal should then show two linked pairs on its right-hand page. If that page is incomplete in your game, walk the full perimeter before rotating mirrors. Randomly lighting wall discs cannot replace the recorded relationship between the symbols.
Record the clues
Walk through the room and inspect the markings that the game presents as clues. Give each observation time to register. The first objective is not to illuminate every mark at once; it is to send one source beam to each member of a linked pair. Aim at the round disc above the target slot, not only at the painted shape below it.
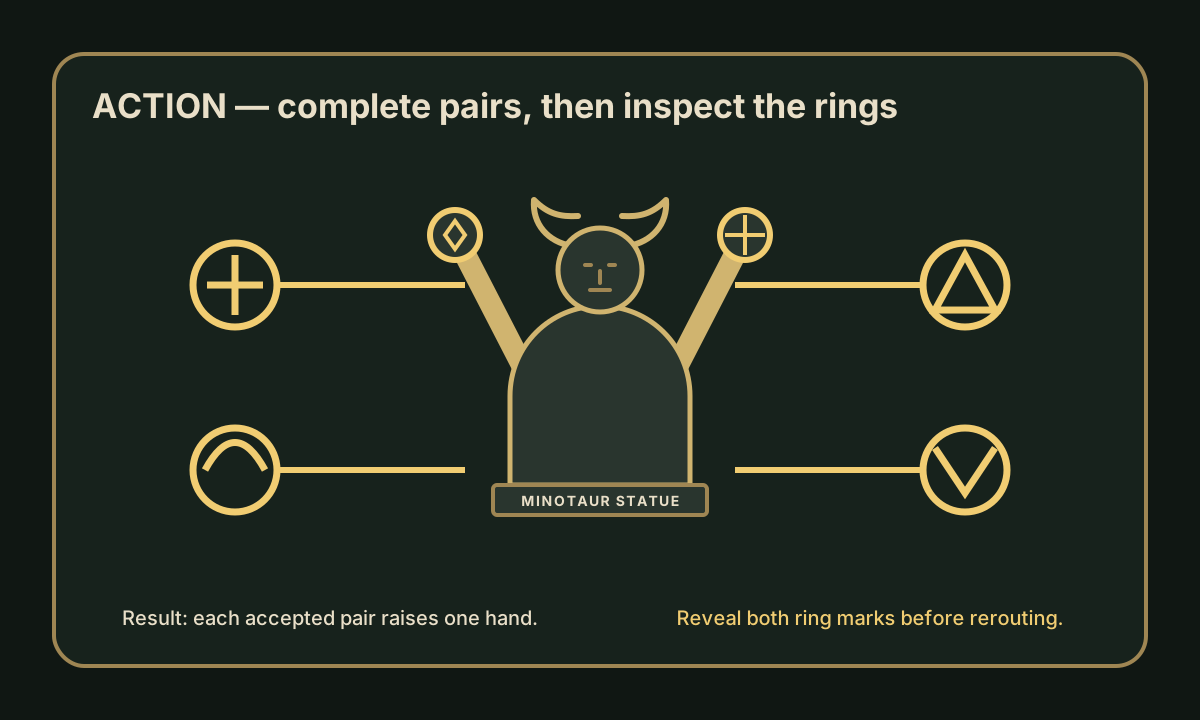
Use the statue's movement as confirmation. A correct pair raises one hand; a beam that merely touches the wall without that response is not complete. When a hand rises, stop and inspect it before changing the pair. The revealed ring clue is needed later and is easy to miss if you immediately rotate the light away.
If the room appears inactive, confirm that the journal page has updated and that the reflector can actually reach the disc above the selected symbol. The source set does not establish one universal controller prompt. Follow the current on-screen instruction for mouse and keyboard, PlayStation or Xbox.
Complete the first two pairs
Start with the lower journal pair. One mark resembles a bell or semicircle and sits on the entrance side. Use the reflector across from that mark and aim at the disc above it. The other mark resembles a fork or T and is in the neighboring wall run; use its opposite reflector. Completing the pair raises the first hand.
Wait until the hand is in place at the platform edge. Stand on the eye-marked plate beside it and use Sophia's revealing light on the ring. Wait for the new mark to appear in the journal. You do not need to illuminate its wall slot yet; recording it now prevents confusion during the final stage.
For the other visible pair, target the triangle with two interior lines and the mark resembling three fingers pointing downward. The triangle is visible. The downward-fingers mark occupies an apparently blank slot beside the reverse-A-shaped wall mark. Aim at that empty slot even though the symbol is worn away. Completing the pair raises the second hand; reveal its ring and let the journal record the second hidden mark.
If you started with triangle/downward-fingers instead, the opposite hand rises first. That does not change the solution. What matters is that both linked journal pairs have been accepted and both rings have been examined before the final routing.
Reveal the hidden pair
Open the journal after both ring reveals. Two additional marks should now appear at the top of the page. Written solutions describe them as an inverted Y and a W; the video calls the second one a three-spike mark. These labels refer to the same clue stage, but their typography is not official UI text.
The first hidden target is two slots below the triangle. Use the reflector on the opposite side to illuminate the first round disc in that wall run. Because the paint is absent, count from the triangle instead of looking for a visible glyph. This hidden target can be reached directly and does not require the middle mirror.
The second hidden target sits adjacent to the triangle and corresponds to the three-spike or W-like journal mark. The direct side angle cannot reach it. This is the target that needs the two-reflector path. If either hidden slot seems wrong, reopen the journal and use its relative position rather than relying on a symbol nickname.
Finish the mirror route
Take the side reflector serving the final hidden slot and point it toward the mirror in the middle as seen from the entrance. Move to that middle mirror and redirect the received beam toward the blank disc beside the triangle. This creates one continuous path: source to side reflector, side reflector to middle mirror, and middle mirror to the hidden wall slot.
Troubleshoot in the same order. If no light reaches the middle, correct the side reflector. If the middle receives light but the wall remains dark, adjust only the middle mirror. If the target disc lights but nothing moves, check that the other hidden slot is still active and that both hand clues were recorded. Avoid resetting the visible pairs unless a hand never rose.
Completing the hidden pair raises the whole Minotaur and reveals a new column beneath it. Trying to use the column triggers an ambush. Defeat the soldiers, then return to the column and interact with it again to raise the bridge.
Statue raised but the bridge is still closed? Finish the fight and use the column again before changing any mirrors. Once the bridge is up, cross it and enter the statue.
Sources and limits
The primary verification is NEON Jai's narrated August 29 gameplay walkthrough, which continuously shows the clue scan, both visible pairs, both hand-ring reveals, the hidden slots, the middle-mirror route and the completed mechanism. The sequence was cross-checked against The Big Lead's Minotaur guide and GameRant's symbol solution. An official Focus page supports the game's sphere-based light mechanics generally but does not publish this room's answer.
The September 5 recheck compared the hand-arrival and ring-reveal footage with SuperSoluce's Chapter IV images 49–55. The practical checkpoint is a hand resting within reach beside the eye-marked plate. GameSpew's Chapter 4 walkthrough supplies the final ambush and second column interaction; fef's French Steam guide independently notes the fight in this room but does not document the mirror solution.
Sources were reviewed through September 5, 2026. The direct footage verifies the launch-version route, while the English symbol names remain editorial descriptions. If a later patch or localization changes a prompt or glyph rendering, rely on the journal pairings and fixed wall relationships: two visible pairs, two raised-hand rings, one directly reached hidden slot, and one hidden slot reached through the middle mirror.